What to say?
The end result was definitely worth it. But, being without a bathroom for 10 1/2 weeks wasn’t always fun…especially when the project was estimated at 3-4 weeks. Our contractor was honest as the day is long and in the end, that was worth a lot. I didn’t micromanage the project as much as I “could” or “should” have, but operating as general contractor from work wasn’t realistic and so yep…it was a long project.
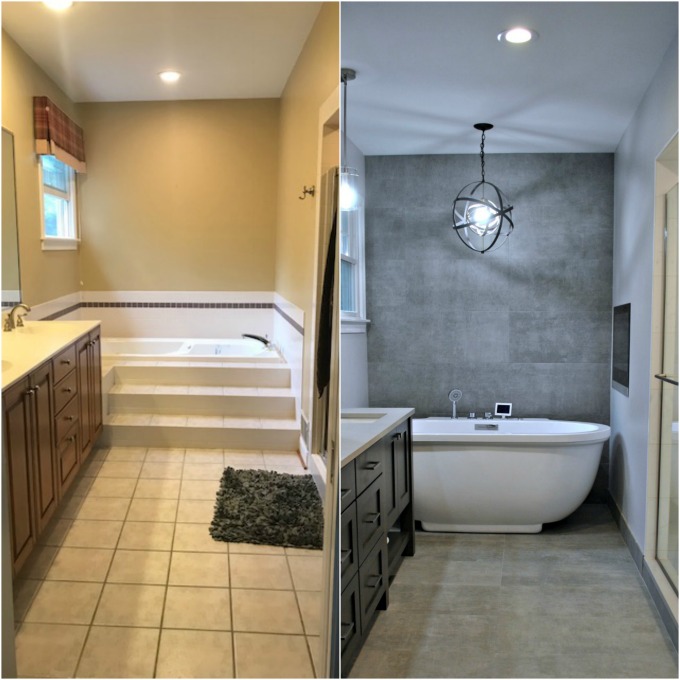
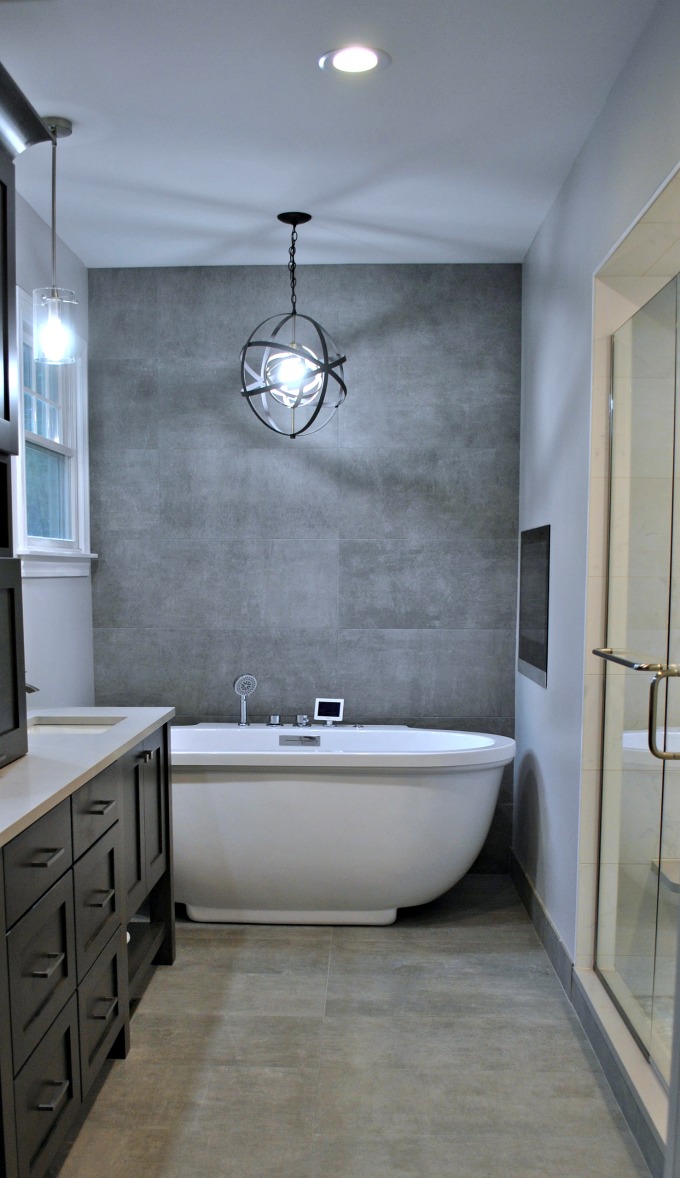
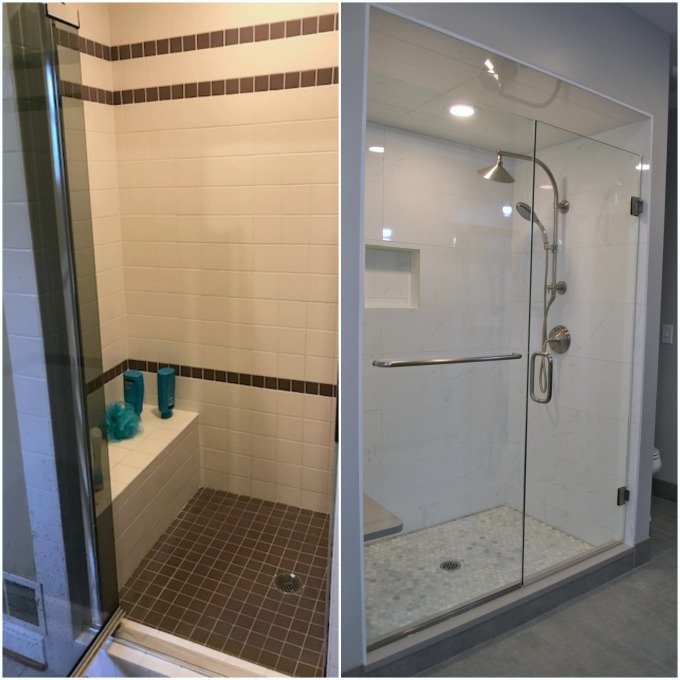
My vision was GREY — accomplished.
I learned that brushed nickel is far more expensive as compared to other finishes.
I also learned that custom shower doors are budget-breakers.
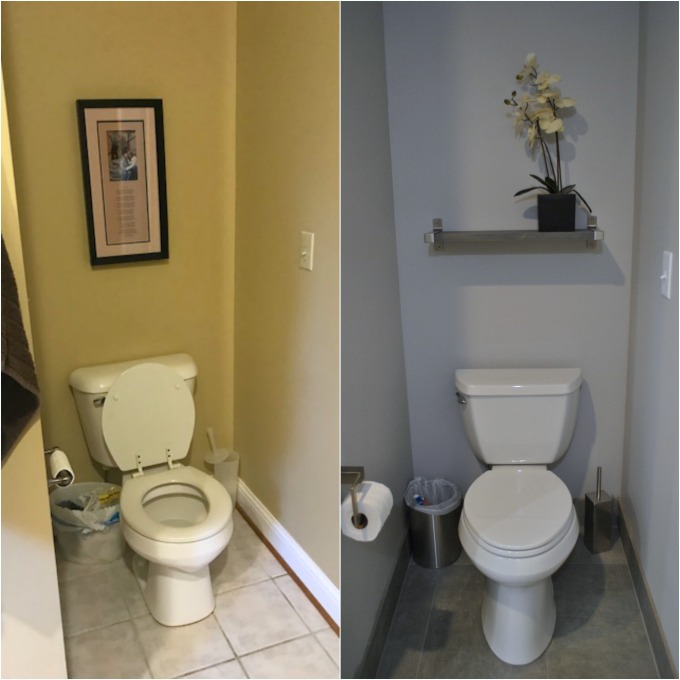
Oh, and toilets are really cheap. I had no clue.
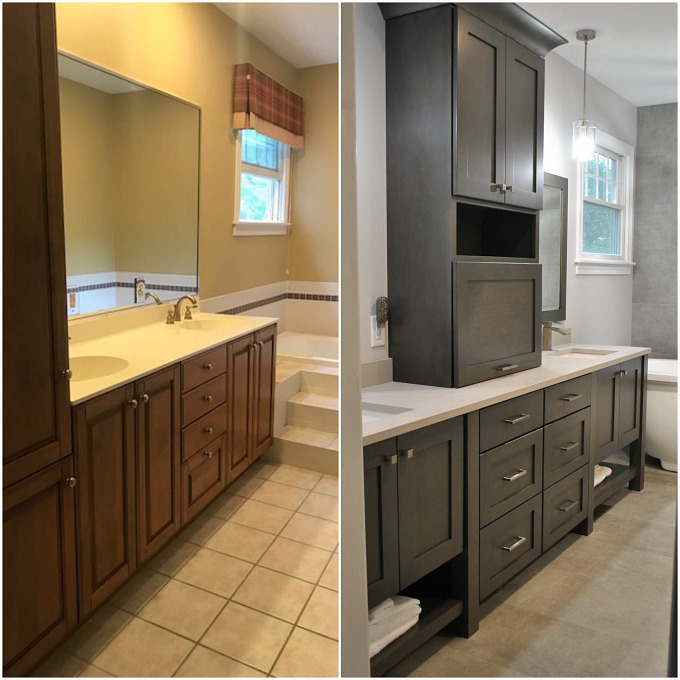
I wish I could say I researched and crunched numbers and did things “right”, but I really just winged it. I knew I wanted to use the company that had remodeled our kitchen for the cabinets and that was a relief to know and trust in them.
The rest was a shot in the dark – I just chose a grey paint comparing it to other greys. I didn’t bring samples of any finishes or tiles to see what would look good with what – I just went with what I liked and fortunately, it worked out.
I needed a bit of help selecting tile (ceramic shower and porcelain floors and wall), the counter tops (quartz), and the darn chandelier. Finding a bathroom-appropriate chandelier that wasn’t overly feminine and fit the industrial-chic look I was going for…tough. Finding a knowledgeable tile supplier was helpful. My Pinterest boards were ALL OVER THE PLACE — farmhouse, industrial, traditional.
My first step was to find out what I was MOST drawn to and in my case, it was large, grey tiles that ran up the back wall behind the tub.
The tub and TV were Mark’s splurge. He loves hot tubbing — it’s really his top priority and only hobby (until he starts hockey on Sunday!). Our tub has radio, Bluetooth connectivity, and lights. Oh, and jets. A freestanding tub (my want) and jets (his need). The TV is a SmartTV – not sure how much use it will get with the jets roaring, but boys will be boys, I guess. If I ever figure out how to operate the thing, I’ll be heading that direction with a glass of rosé real soon!
Feel free to comment or message me with questions!
Be well,
![]()

Just beautiful! Worth the wait
This is probably an odd question, but I am curious to know how easy it is to keep the shower floor tile clean? I love the look of the hex tile, but I have seen a few reviews about how difficult it is to maintain and it makes me cautious.
Author
I can let you know – just used it for the first time today 😛 We have very small grout lines between all of the tile and I think the key is getting a grout color that isn’t white-white. Much more forgiving!
You mentioned getting your cabinets from the same source as your kitchen cabinets – what is the brand or supplier? The bathroom looks great!
Thank you,
Kathy
Author
It’s a local company that works with Omega – https://www.omegacabinetry.com/ 🙂
I love the chandelier – would you share where it’s from? And do you think it would give off enough light on its own (I’m struggling to find a chandelier that I love – actually 2, one for each end of the table – for my dining room). Thanks!
Author
Wayfair! https://www.wayfair.com/lighting/pdp/trent-austin-design-hawaiian-gardens-1-light-pendant-trnt2427.html?piid=22459630%2C22459632